4 Traditional Janmashtami Special Recipes
Make this Janmashtami sweeter with these fabulous goodies and savories. One of them is Lord Krishna's favorite!
Taler Bora (Palm Pakoras)
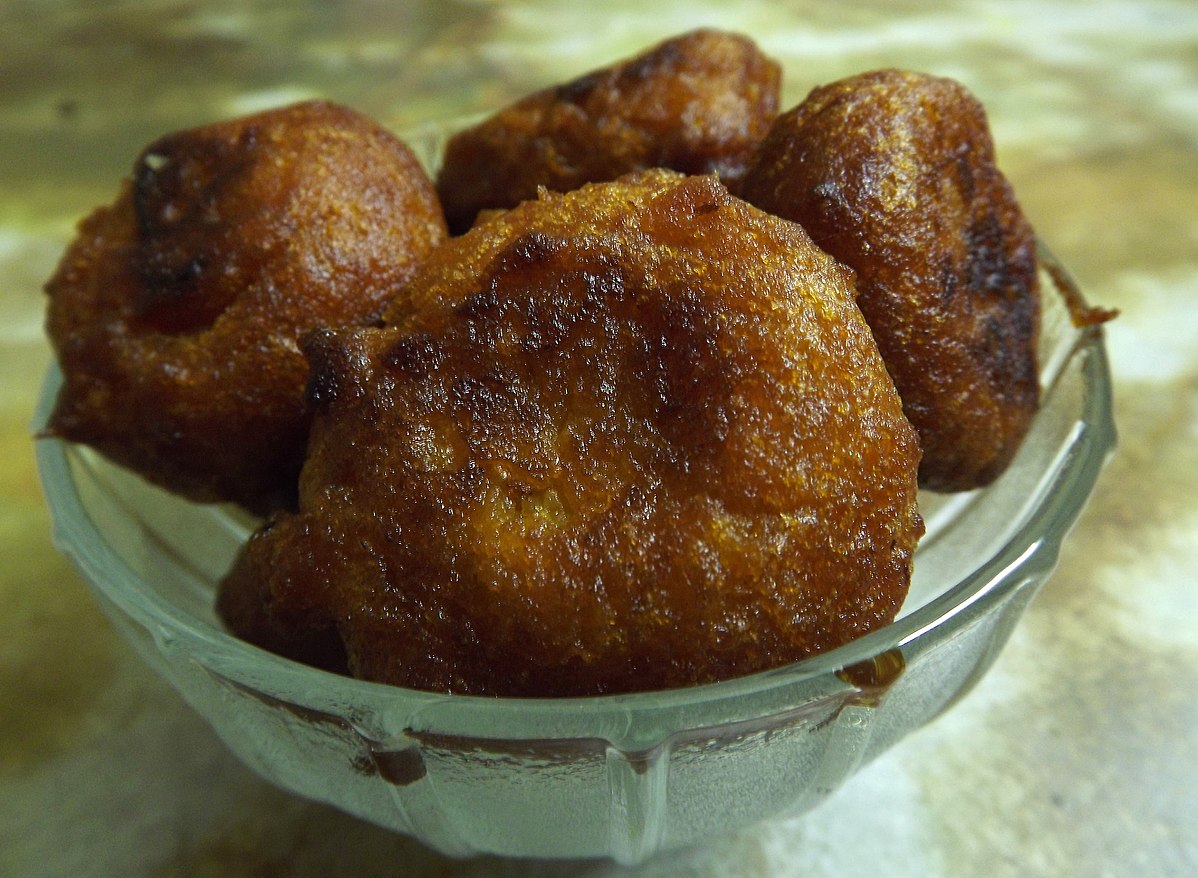
Photo courtesy Wikipedia
Taler Bora is typically made for Janmashtami in Bengali homes, but then my in-laws don’t celebrate Janmashtami, but I decided to go ahead and make this one since it’s my mother-in-law’s personal favorite. She lamented about the fact that her mother was no longer around (apparently she had been an awesome cook and celebrated most festivals too!! My loss totally here, but she did mention though that our cook knows how to make this sweet and they taste yummy too!!
So honest confession, I had a lot of help on this one from our cook!! And thank God for her help on this one.
Read on for details on “Taler Bora”
Here is what you shall need:
- A medium to large sized Taal (Palm)
- Grated coconut (a small one, or half of a medium sized one)
- Flour (Atta) – 200 gm
- Sooji – 100 gm
- Sugar – 150 gm
- Cooking oil (for deep frying the boras)
How to make the boras:
- Remove the skin of the Taal
- The taal typically has 3 partitions, each having a seed. Separate the partitions
- Take a partition at a time in a bowl, add some water and kneed the tal. This will make the pulp from the fruit loose and easy to separate from the fibres and seed
- Scrape out the pulp completely from the seeds using a sieve or a grater.Since we didn’t have a grater, we scraped it of using a sharp edged plate and then sieving out the fibres
- Pour this thick pulp into a mixing bowl
- Add the grated coconut, flour (atta), suji and sugar making a paste of medium consistency. It should not be too watery.
- Take some oil in a frying pan. Heat the oil properly and then drop the mixture in the oil in the form of balls. Deep fry till golden brown.
- Serve either hot or cold as preferred.
- Note: The boras do tend to get sweeter as they cool, so in case you don’t have too much of a sweet tooth, you can work around the sugar you add.
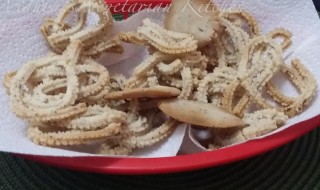
Baked Coconut Milk Murukku/Chakli and Thattai
Coconut milk murukku is very famous in Tirunelveli. The murukku is white and of course, crunchy and loaded with the flavors of coconut milk and oil. I love this murukku and started making the same at home too. But this time I thought, why not bake it instead of frying? Can you believe it's an under 30 minutes dish? So why we can't we try this for this Janmashtami? Presenting the Baked Coconut Milk Murukku!
Ingredients:
- Rice Flour - 1 cup (I went with store bought one)
- Urad dhal flour - 1 tbsp (Dry roast the urad dhal without oil and grind into powder)
- Butter at room temperature - 1 tbsp
- Salt - 3/4 tsp (adjust according to taste)
Steps:
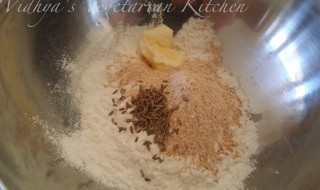
- Mix the rice flour, urad dhal flour, cumin seeds, hing and salt.
- Mix them well and now add butter and half of coconut oil.
- Mix them well and slowly start adding the coconut milk and knead the flour without any lumps.
- It should not be too soggy and moist but at the same time, it should not be dry too.
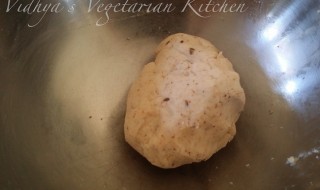
- If required add 2 tbsps of water and knead the dough like a big ball. It should not stick to the vessel.
- Now preheat the oven to 375 degrees F.
- Wrap the baking tray with aluminum foil and grease it with coconut oil.
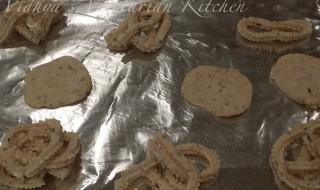
- Using the murukku presser/nazhi as we say in Tamil, press the murukku in the desired style.
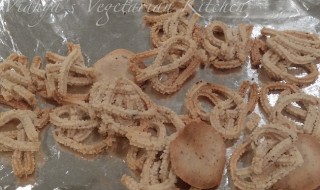
- As the murukku should retain the white color, the baking temperature is very important. Bake it at 375 degrees F for 10 minutes and reduce the temperature to 350 degrees F and bake it for 3 more minutes. If required add two more minutes but don't bake for more than 15 minutes. Addition of butter gives the crunchy texture so don't over bake it.
- That's it! Yummy guilt free murukku is ready within 30 minutes.
Just tried some thattais with the left-over batter from the presser. :-)
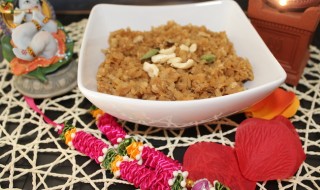
Vella Aval Upma / Sweet Poha
We usually prepare this Aval/Poha upma with jaggery for Janmashtami. Why do we prepare this upma with poha? Because Lord Krishna loves poha. :-) Yes, I would like to share the story of Krishna and Sudama. Many of us might know it already but here it is again.
The tale of Sudama and Krishna comes from the Bhagavatam. They do their schooling together and after that, they move on in their lives. Krishna becomes the king of Dwaraka whereas Sudama returns back to his town and lives a simple life. Sudama goes through bad time in his life and even in that situation, he doesn't want to get help from Krishna. But when things go out of his hand he goes and meets his friend and he takes the beaten rice / poha for him. Krishna treats him royally and overwhelmed Sudama doesn't ask for help. When he returns to his home he finds a huge mansion in the place of his small house and notices all the wealth. He thanks Krishna and continues to live a simple life. This story emphasizes how an ideal friendship should be without any expectations and true devotion to Sudama.

So now coming back to the recipe, this recipe doesn't need any special occasion. It's a simple recipe perfect for toddlers and can be served as a snack too.
Ingredients:
- Thick Poha / Aval - 1 cup
- Powdered Jaggery - 3/4 cup
- Elaichi / Cardamom powder - 1 pinch
Steps:
- Wash the poha nicely and let it soak in water for 5 minutes.
- Then squeeze all the water out and let it sit.
- Now add the powdered jaggery in 2 tbsps of water and heat it in low flame till the jaggery melts and turn off the heat.
- Add this melted jaggery syrup, grated coconut and Cardamom powder to the poha and mix well. (You don't need to cook the poha the soaking in water makes it soft)
That's it. Yummy poha is ready.
Notes:
- You can add cashew nuts and raisins fried in ghee.
All image credits: Vidhya
Sweet Seedai (Jaggery seedai)
Krishna Jayanthi / Gokulashtami /Janmashtami is right here. I love this festival because there will be lot of savory items like thattai, murukku, seedai and sweets too :-) . Drawing those tiny Krishna feet with maakolam (rice flour), helping (???) amma with making these bakshanams(snacks) and distributing the same with neighbors, wow sweet memories.
Here is the recipe for the sweet seedai or the jaggery seedai. (Vellam in Tamil, means Jaggery)
Prep Work:
- Dry roast 1 cup of urad dhal till they turn golden brown and let it cool. Then dry grind them into a fine powder. This roasted urad dhal powder is required for muruku, thattai and also for seedai.
- Dry roast the rice flour for couple of minutes, this helps the seedai mixture to blend well , removes the raw smell of the store bought rice flour and also prevents the seedai from bursting.
Ingredients:
- Rice Flour : 1 cup (Stored bought, dry roast it )
- Urad dhal flour (Prepared as mentioned above) : 1 tbsp
- White sesame seeds - 1 tsp
- Salt - a pinch
- Butter - 2 tbsps (At room temperature)
- Jaggery - 3/4 cup (1/2 cup is enough, but my kiddo and hubby has a very sweet tooth, so adding a little extra)
- Elaichi/Cardamom - 2
- Water - 1/2 cup
- coconut - 2 tbsps
- Oil for frying
Step 1: Making Pahu or the Jaggery water solution
- Heat the 1/2 cup of water, as it starts to boil add the jaggery and crushed elaichi.
- Let it dissolve well and bring to one boil and remove it from heat.
- Let it cool down.
Making Seedai:
- Mix the rice flour, urad dhal flour, white sesame seeds, pinch of salt, coconut and butter together without any lumps.
- Sprinkle the jaggery water or pahu on a needed basis and knead the dough.
- It should not stick to the vessel and knead the dough like a big ball.
- Make small gooseberry size balls out of the dough and keep it aside. Leave it for up 10-15 minutes.
- Now heat the oil, and fry about 4-5 per batch. (Make sure the oil is not too hot and keep flipping them)
- Its take about 3-4 minutes for the seedai to get cooked. Fry till the oil bubble sound stops. (In Tamil we say, ennai osai adangum varai)
- Let it cool down and that's it jaggery seedai is ready.